ARCHISTUDENT
AN ARCHITECTURE STUDENT'S PORTFOLIO SHOWCASING HER WORK AND THE LEARNING PROCESS
Computer Applications - Work In Progress


16.05.2014
Applying Material


I started by applying material on the roof. I have used an image to apply onto the roof. I have then entered number of tiles to have multiple roof tiles.
Most of the other materials applied to my building are from Autodesk.
Overall outlook of model.
Contour

Countour was made on 3ds Max using "soft selection" and then "Paint Deformation" which allows push and pull on the plane.
Handrails were created using "pipe". Balustrade was created using "Array".
For the Ocean and Sand, I have used Mental Ray Arch + Design. Then under "bump" I have chosen "Ocean" for the sea, and "Speckle" for sand.
Most of the other materials applied to my building are from Autodesk.
Rendered Images


Skylight windows.
Applying Material
After modeling in Rhino, I have exported the file to 3ds Max for rendering. I have applied simple colours onto my model to indicate the different materials.
Daylight
Roof planks were also created using "sweep" then "array". Then the bracing for the skylight was created.
Daylighting is applied for the light and shadow.
The rafter and roof beam were created using "sweep". I then used "array linear" to create multiple rafters.
Rendering
Render 1 (eye level view)
Model after creating the windows and layering the items.
Window openings are created using "Boolean difference". The window frames and glass were created using "surface from planar curve" and "loft".
The floor slab was created using similar technique. The staircase opening was created by "Boolean Difference".
For the first Rendering, I have used an image as Viewport background and adjusted my building until it fits into the background. And then I used the same background as the Environment to render.

Eye Level View
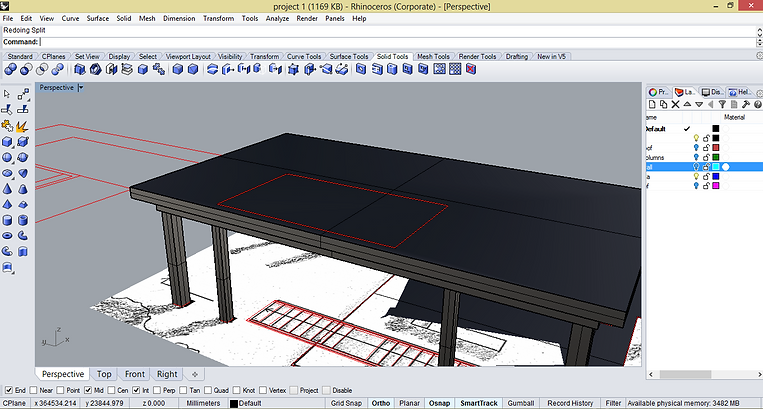
After extruding the walls, I splitted the walls with intersecting planes to achieve the desired shape.
I started off modelling the beams and columns by extruding the curves and creating surfaces. With all the surfaces, I then convert them into solid using "create solid".
Render 2 (bird's eye view)
After tracing floor plan, elevations and sections, I have imported the drawings into rhino for modelling.
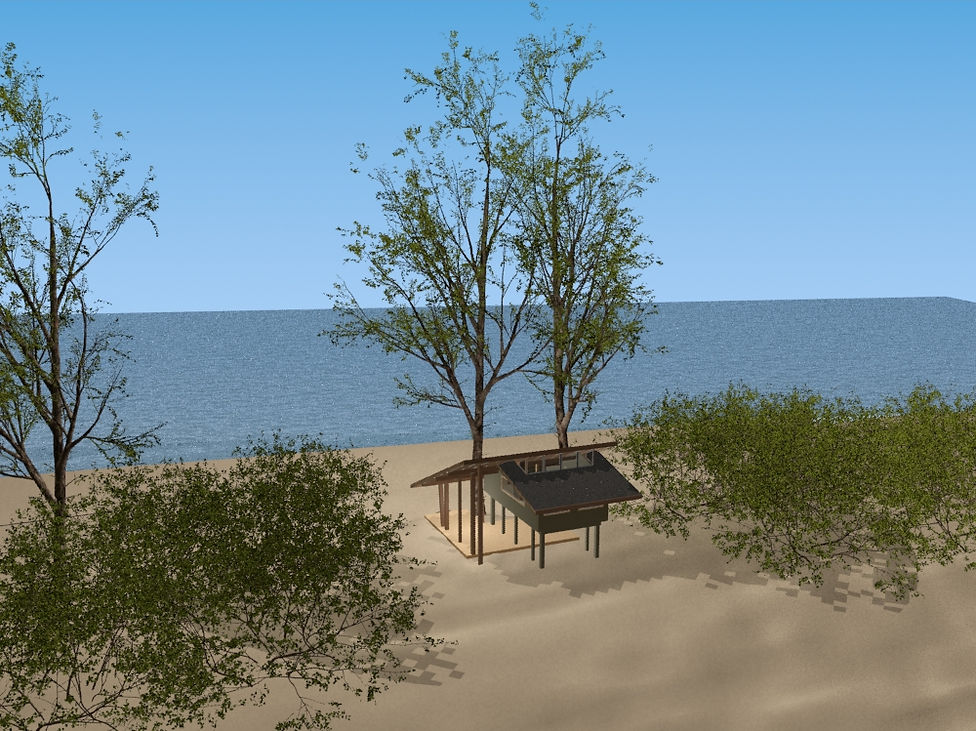
For the second rendering, I have used gradient as the environment and then coloured it blue to represent the sky.
Render 2 (Bird's eye view)

INTERIOR RENDERING
Interior 1


Modeling
First floor Interior furnitures and lightings

Environment mapping is included for the final rendering. With adjustment of the the background colour and exposure value, I have brightened up the render. Bushes are also added at the side of the building.

Interior 1 Final Render
Interior 2


Ground floor Interior furnitures and lightings

The sky is included for the final rendering. With adjustment of the exposure value, position of the sun, and the shadow intensity, the final render is produced.

Interior 2 Final Render
20/06/2014 In-class exercise
ANIMATION


Frames Render 3


Frames Render 1


Frames Render 2


Frames Render 4
Test Rendering
1. Object Movement
2. Shadow Movement
3. Ocean Movement

3ds Max
Use of Path Constraint for camera movements and Walkthrough Assistant for certain camera settings.

3. Ocean Movement
The water movement is done by using Ocean bitmap under "Arch and Design". Ocean Parameters can be adjusted. The waves are done by adding Wave in the modifier.

1. Object Movement
Illusion of wind is made by moving objects like a swing. The swing is rotated with the pivot on top of the chain of the swing.

2. Shadow Movement
Shadow movement is created by moving the sun position within a time frame.
Adobe After Effects

Adobe After Effects is used to compose all the renders.